
Enchanted Light Bloom Headdress
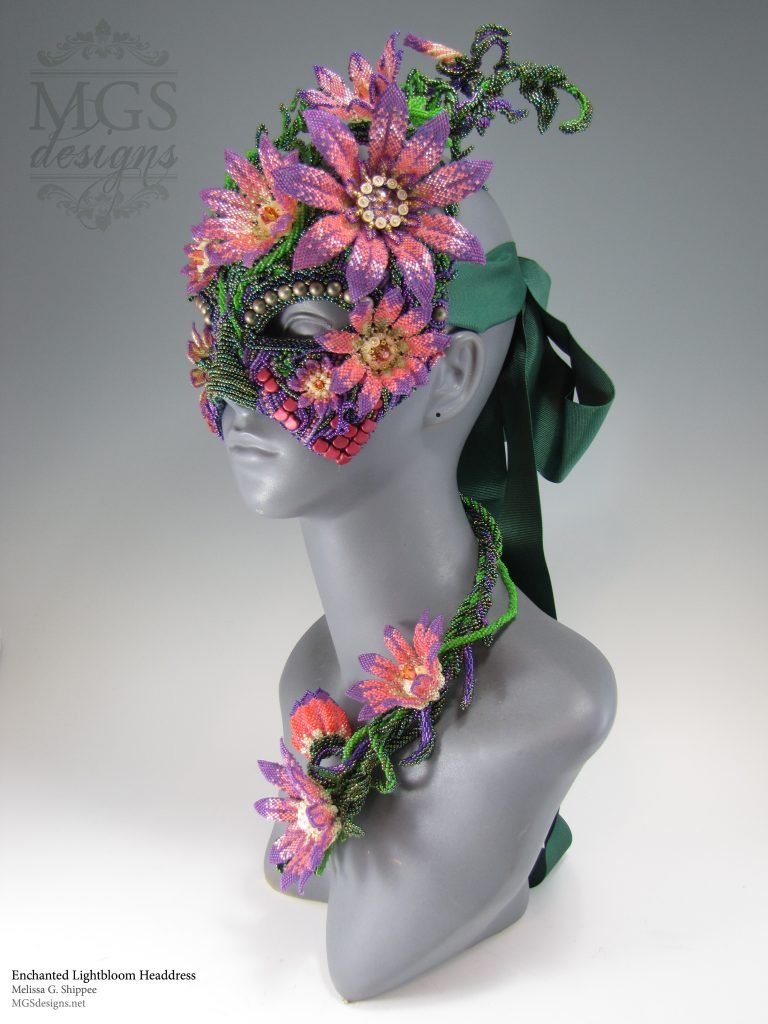
Enchanted Lightbloom Headdress
The Process of Creating an Extraordinary Beaded Headdress
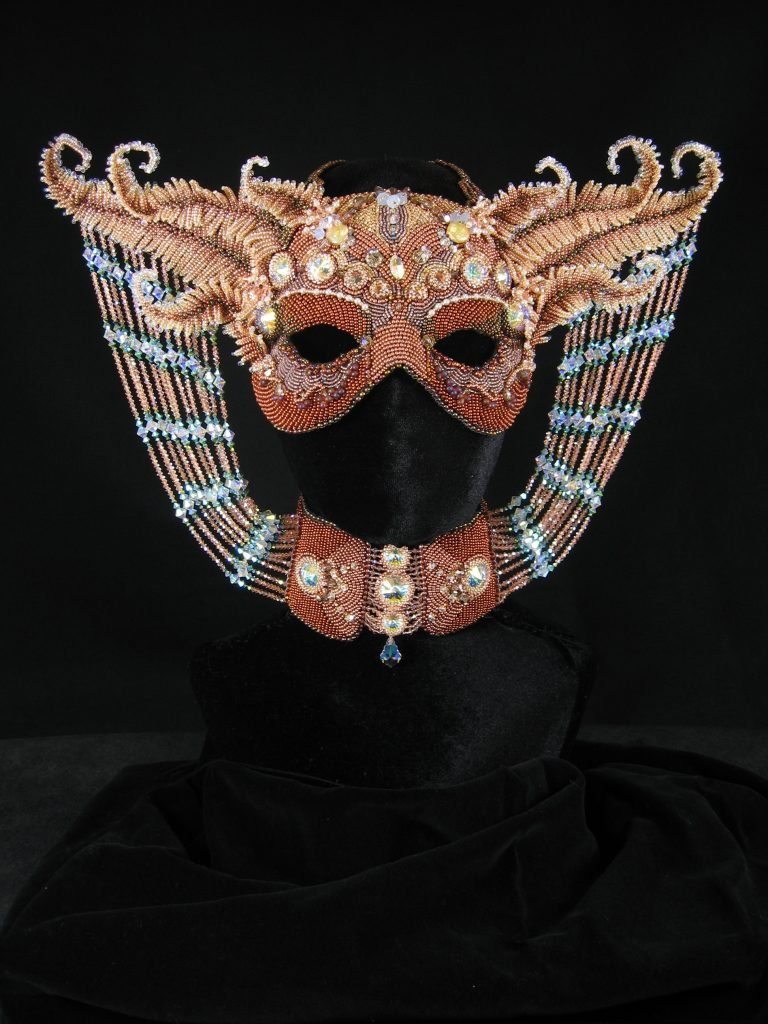
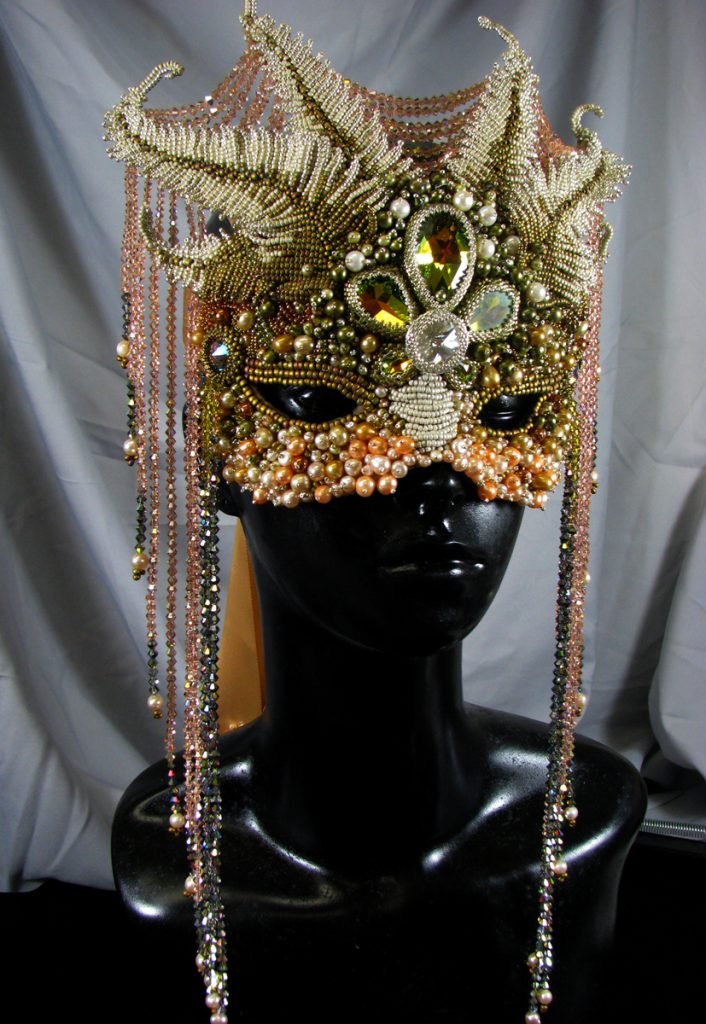
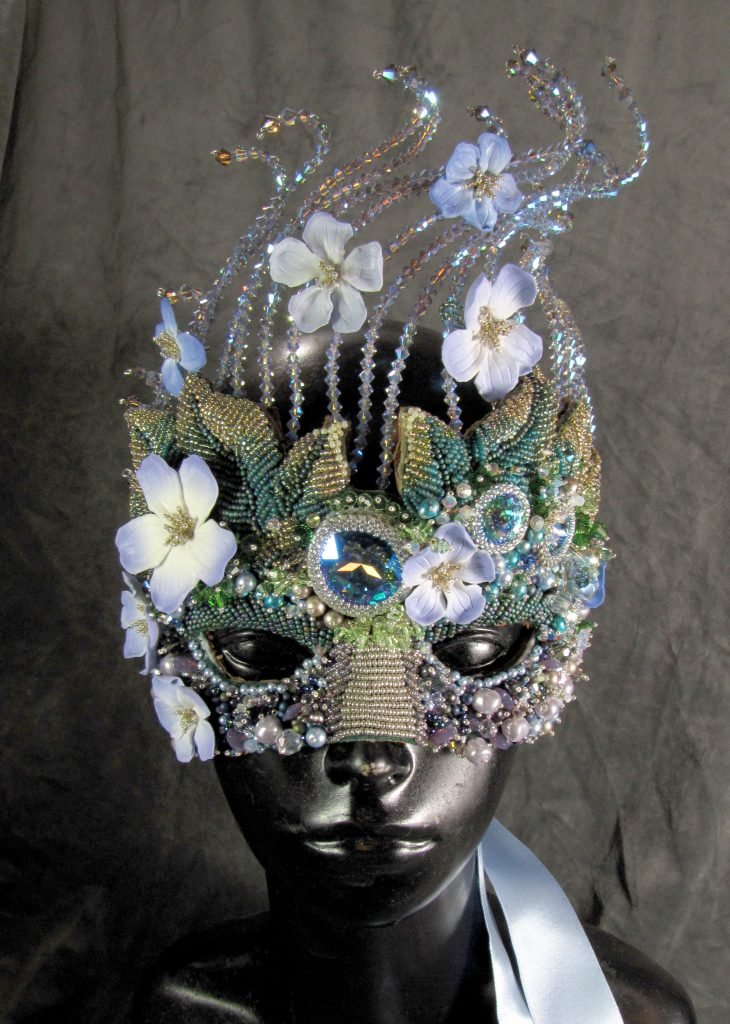
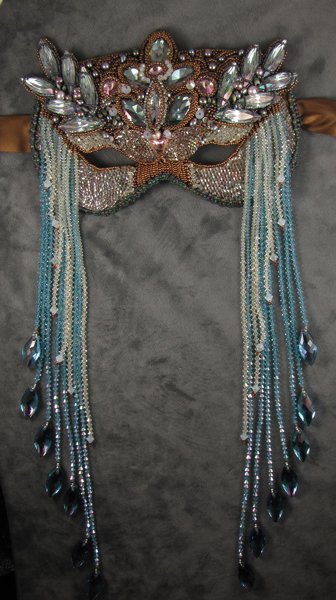
A few years into the craft of bead weaving, I developed a strong desire to begin working in a format other than the usual jewelry types. Necklaces, earrings, and bracelets were fun to make and design, but I wanted to design something a little more unusual, something that would allow me different opportunities to play with form while using bead weaving and bead embroidery techniques. Thinking back on all of my trips to museums, I mentally parsed through all the different types of bodily adornment that people had created over the millennia, and settled on the idea of creating beaded adornment for the head and face.From 2009 to today, I have created a total of nine headdresses. Some are masks that cover only the face, others are headdresses that cover the face and parts of the neck or shoulders, and one sits on the head without covering the face at all. Each piece has been an exploration of materials, techniques, themes, and colors.
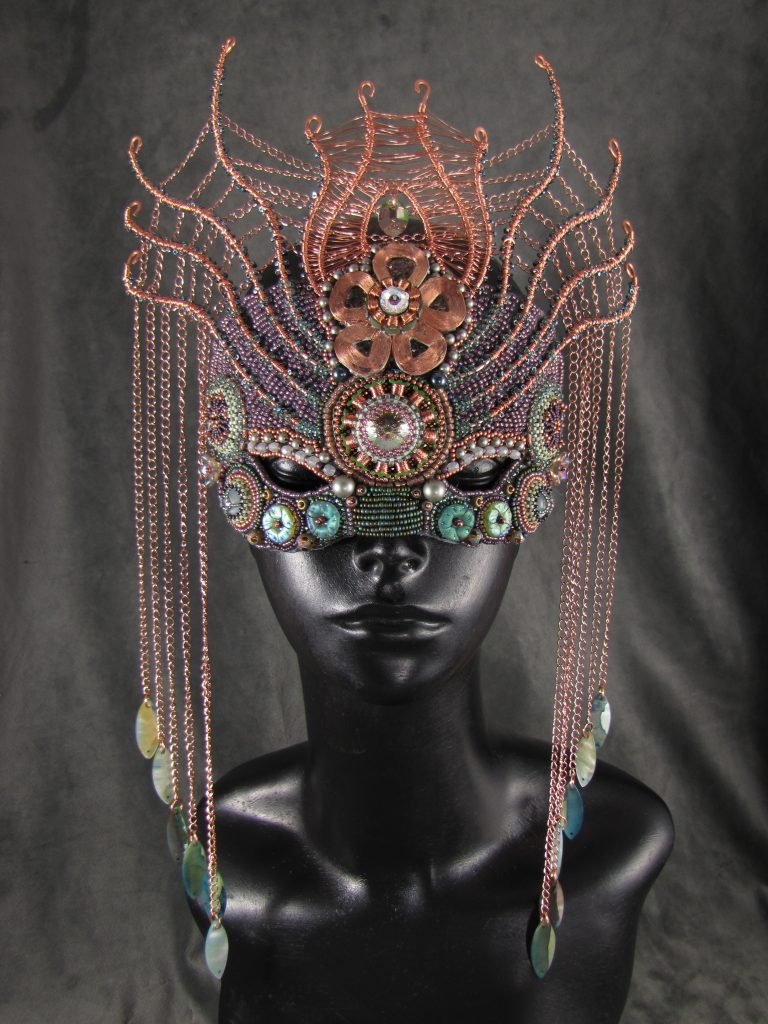
Enchanted Lightbloom Headdress is a first in two different ways. It is my first headdress to incorporate LED lights, and it is my first headdress of which I took step by step photos in anticipation of wanting to share my process with the world.
The Starting Point: Constraints
I find that in designing, the more constraints I have, the easier it is to come up with a cohesive design. By constraints I mean things I cannot change about the project, like the particular beads being used, the size and type of project, the difficulty, particular stitches, and other variables that I can narrow down. With Enchanted Lightbloom Headdress, I started with two major constraints: the beads I was to use were already chosen for me, and I knew I wanted to make a mask.The beads were sent to me by Team Toho Beads so that I could participate in their annual design challenge. They put together a palette of beads with vivid hues of green, yellow, salmon, and purple, inspired by colors from a flower garden. I too found that the colors made me think of a flower garden, and decided when I saw the beads that I would go back to my roots (so to speak) and start by making a bunch of beaded flowers.
Beaded Flowers
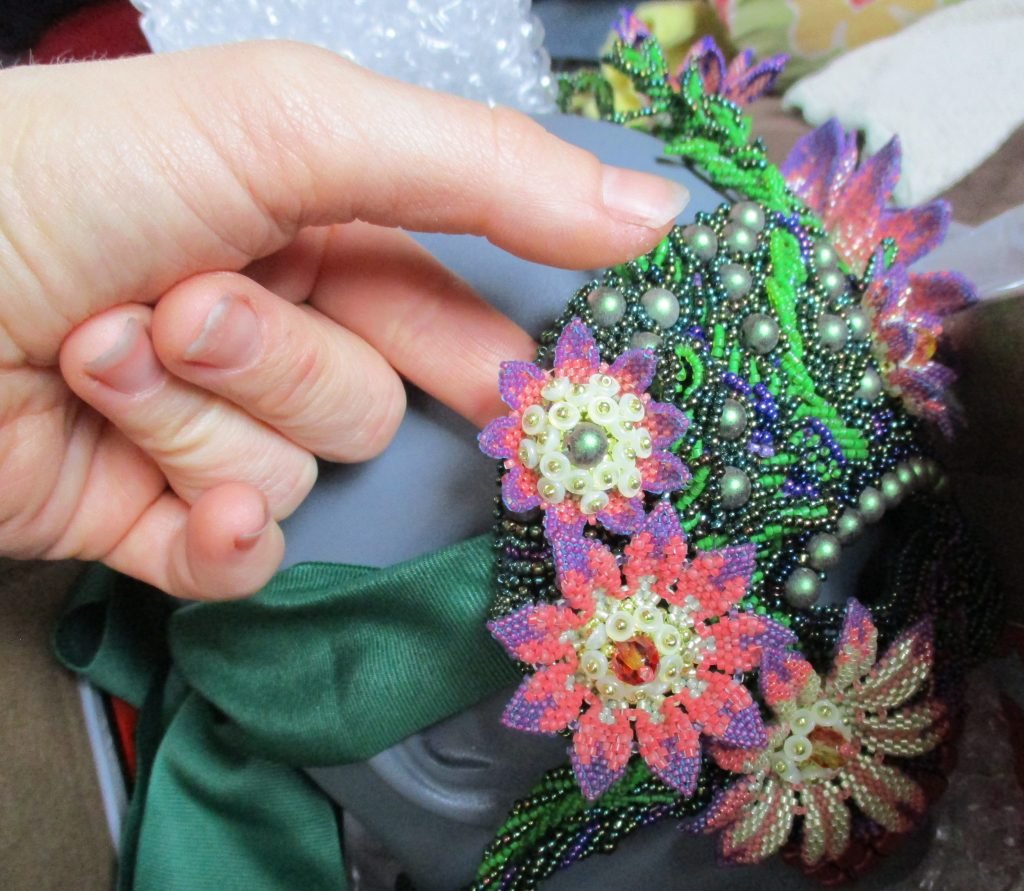
My initial idea was to have a large number of beaded flowers adorning a large mask, with twisting vines and leaves. I envisioned flowers of multiple sizes ranging from very large to very small, and an overall asymmetrical shape with vines growing up out of one side of the mask and then wrapping around the neck to create a partial necklace on the other side of the mask. I like my beaded flowers to have dimension and some variation to them. I started with the largest flower, based off of an old beaded lily design (check the free patterns section of the website). To get the right shape, I ended up having to create a total of nine petals, which I decided was a number suitable for all the remaining flowers as well. For the center of the largest flower, I added my one allowed addition to the beads sent to me, I used a handmade vintage Czech glass opalescent cabochon. For the centers of the other flowers, I used 8mm firepolished rounds included in the challenge and additional beads from the kit.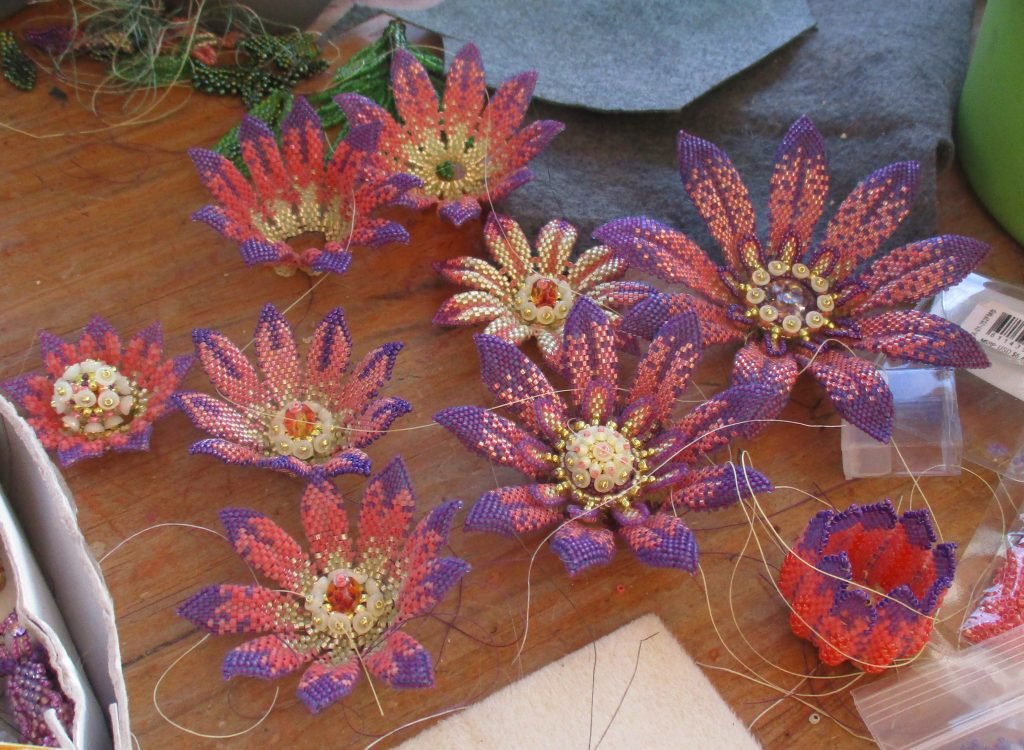
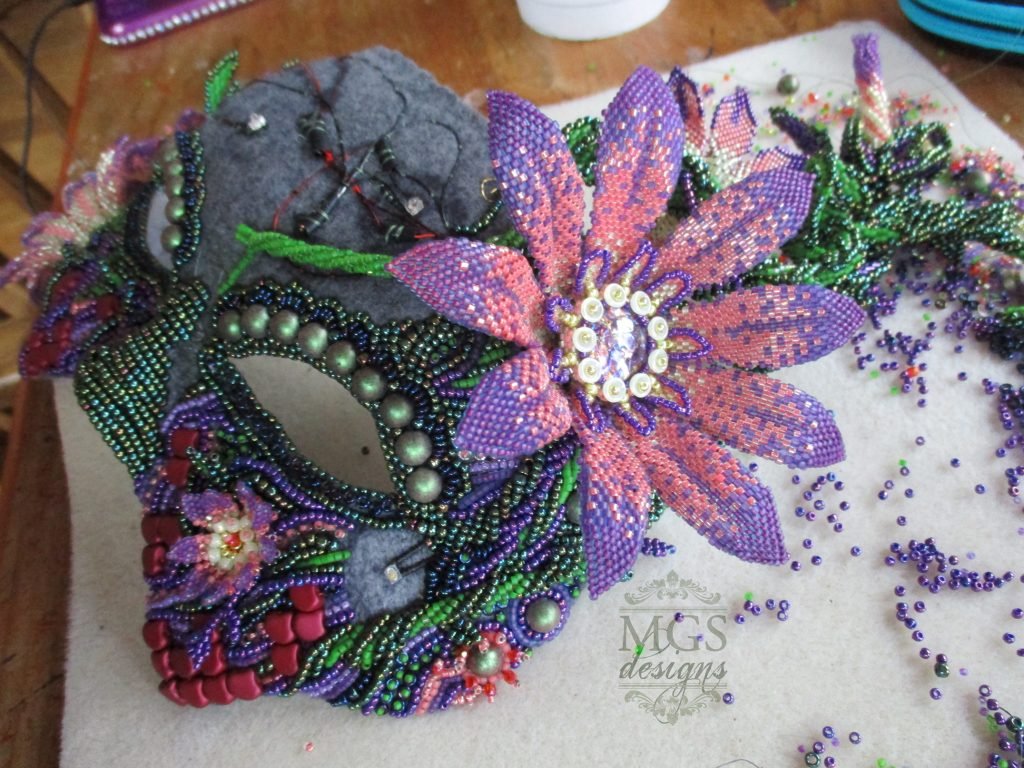
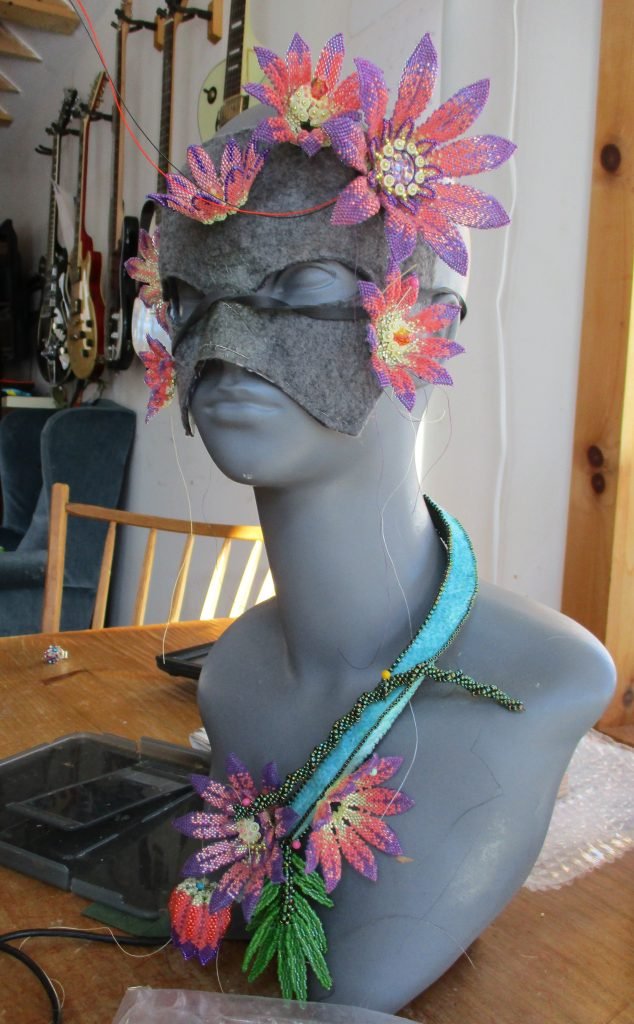
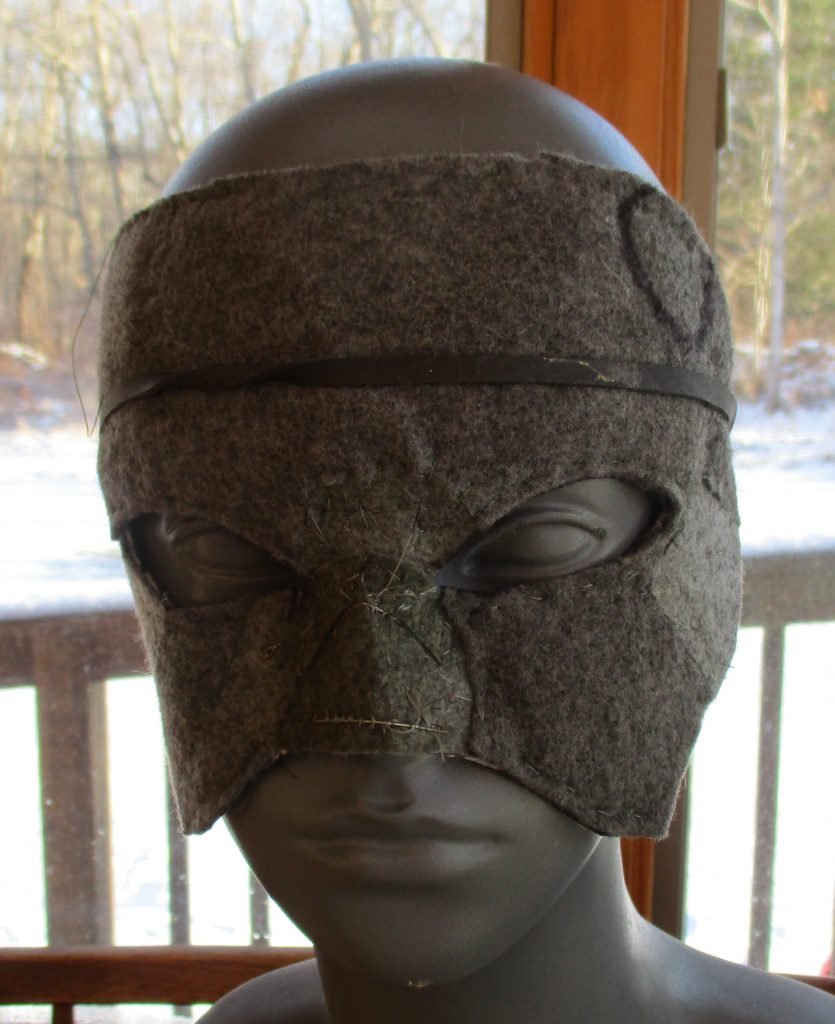 It took a little time to make the mask base (left). I started with a flat, rectangular piece of Peltex (heavyweight sewing interfacing). Using a plastic mask as a guide, I drew a rough outline of the shape I wanted, then started cutting darts into it where I knew the mask form needed to bend or curve to fit the face. I gradually sewed in extra pieces where the 2D sheet needed to be expanded, and removed and stitched together areas that needed to be contracted. I cut out eye holes, then added memory wire to the nose to help it hold its shape. I refined the edges, then decided where the biggest flower would go.
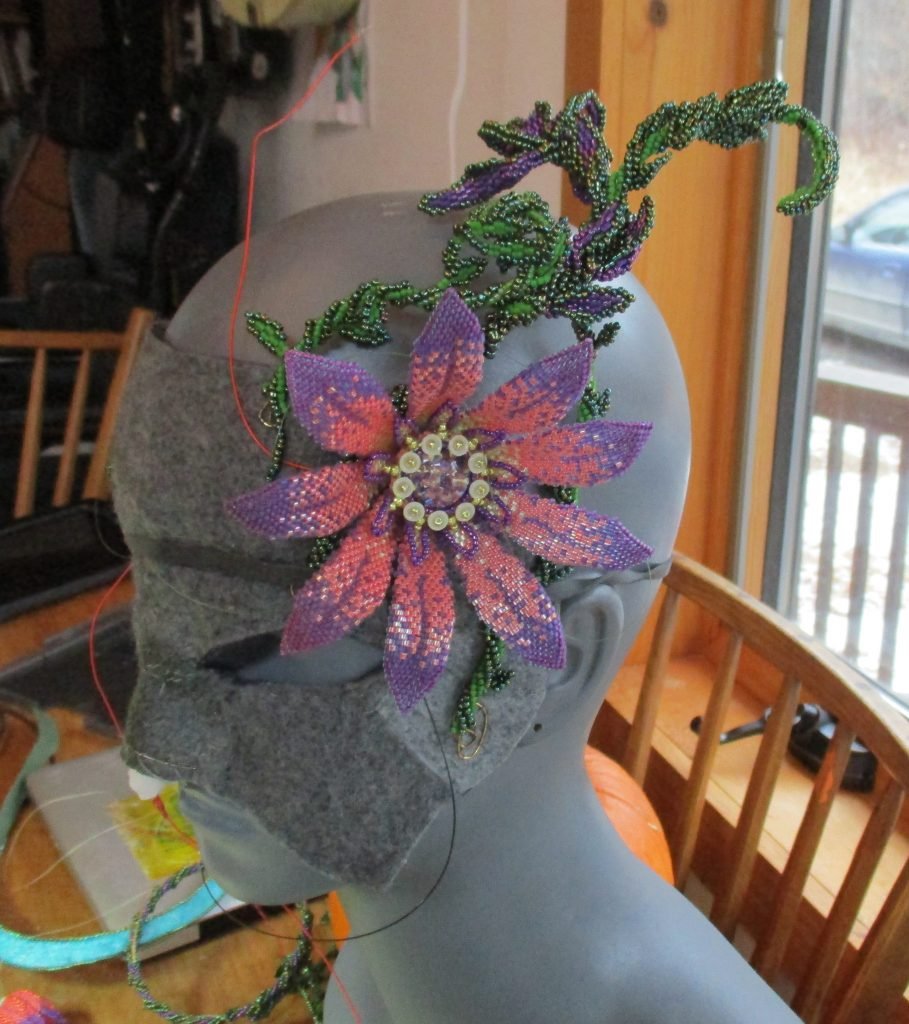
Beaded Vines and Leaves
The first decision I had to make regarding the vines was which beading stitch to use. For my last mask, I used a three-sided prismatic right angle weave stitch for the vines, so I wanted to go another way. I had recently created some twisted tubular herringbone vines for my book, Beautiful Beadwork from Nature, so I decided those vines would be appropriate for the twisted, tangled look I was hoping to achieve. The vines would all have the twisted look, but vary slightly in their colors, degree of twisting, length, and thickness. The vines were probably the easiest and fastest of all the different parts of this project.The leaves took some experimentation, and I ended up settling on a two-drop variation of peyote stitch leaves I've used in many different projects. Like the vines, the leaves would vary slightly in size, shape, and color.I knew the vines should reach up beyond the edge of the mask on the top right, so I had to figure out how to what are normally supple, flexible beaded tubes to hold their shape upright. I ended up using steel memory wire inserted into the center of the herringbone tubes and bent to shape.
LED Lights
At some point, many dozens of hours into this project, I decided I wanted to further challenge myself by adding LED lights under the flowers. I had to do some research and ended up buying tiny flickering warm white LEDs from a lighting provider for model train enthusiasts. From there on ensued an engineering challenge, where I had to decide where and how to hide the battery housing in a way that would still allow access for when the 3V coin battery needed to be changed, and placement of the switch to turn the lights on and off.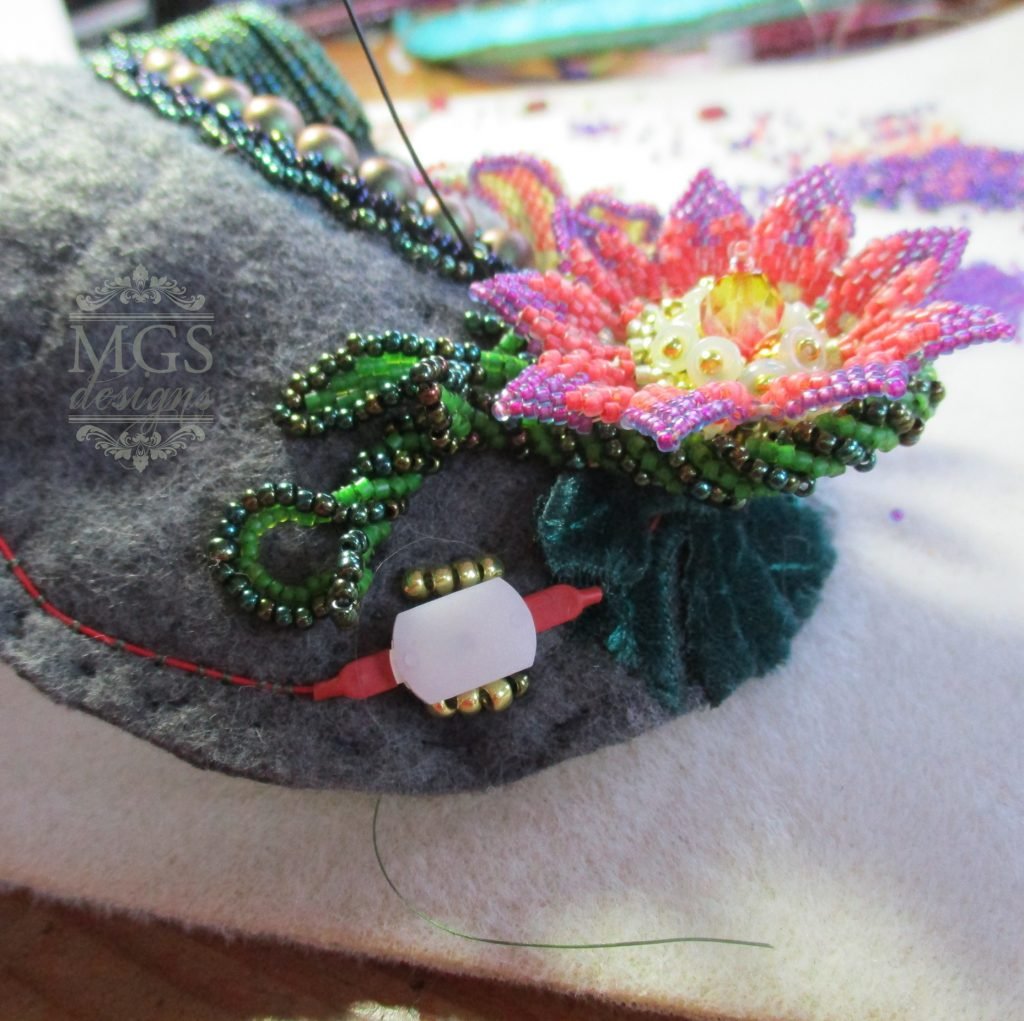
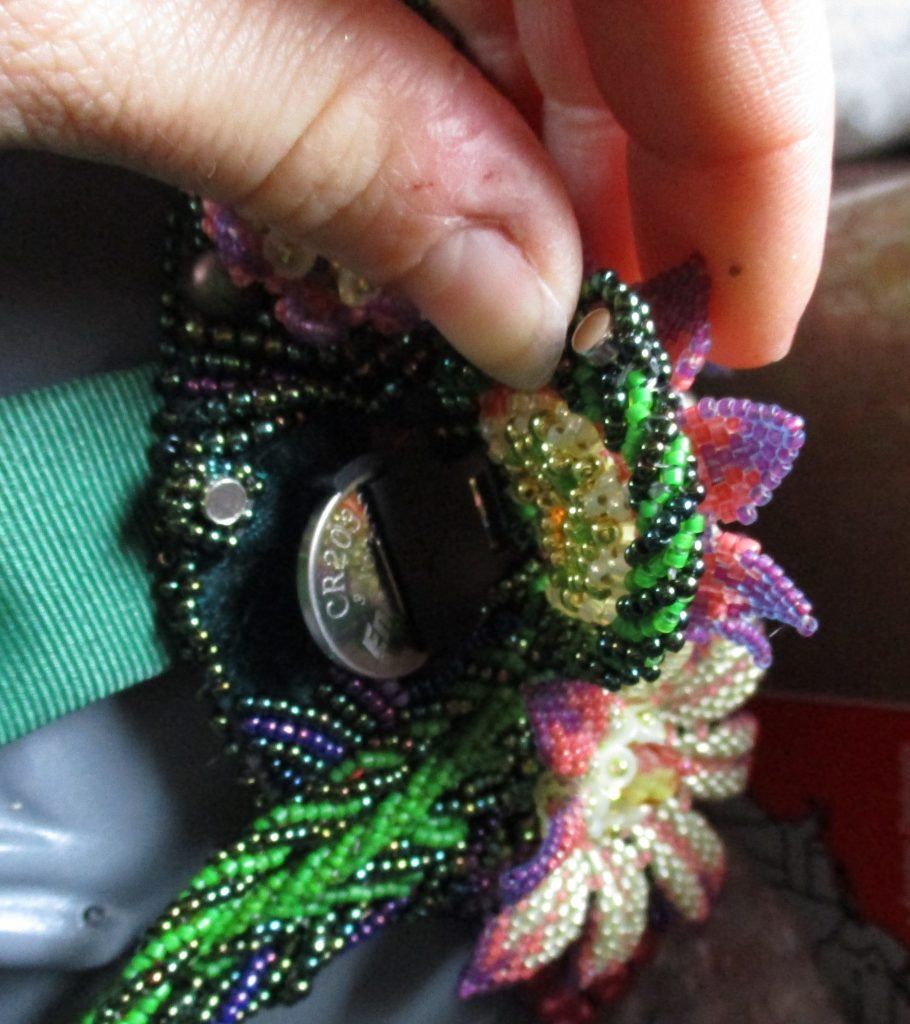 The placement of the battery and switch each under flowers was an easy solution, but the actual securing and wiring of the LEDs turned out to be a small nightmare. Firstly, I did not remember from my college electronics class that LEDs need to be wired in parallel (not serial). I thought when I wired the first few and they weren't working that I had ruined them, but it turned out they were just wired incorrectly. After my frustration led me to a brief education online of correct wiring practices, I was able to re-imagine my wiring scheme. I had to decide what the overall remaining composition would look like in order to place an LED under the flowers I wanted to be lit.The problem I kept running into was I had cut many of my wires too short, thinking the lights would be run serially, and the wires kept breaking after I stripped the plastic coating in order to join them. I believe it was my fault for not having proper wire strippers for the tiny gauge of wire attached to the LED leads, and not any fault of the company who supplied them. I also ran into the problem of my old electrical tape not sticking well and I eventually started just loosely wrapping the connections with the tape then hastily sewing them down to the mask base.
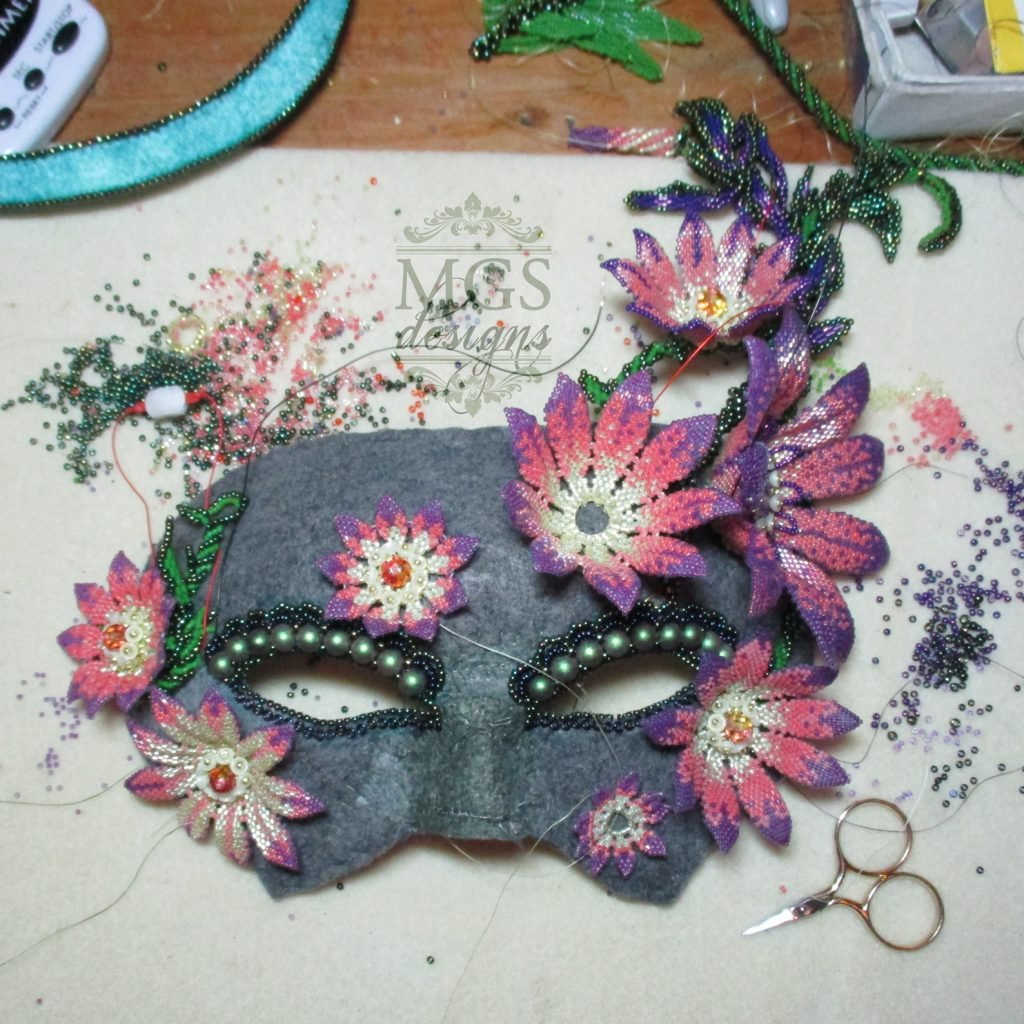

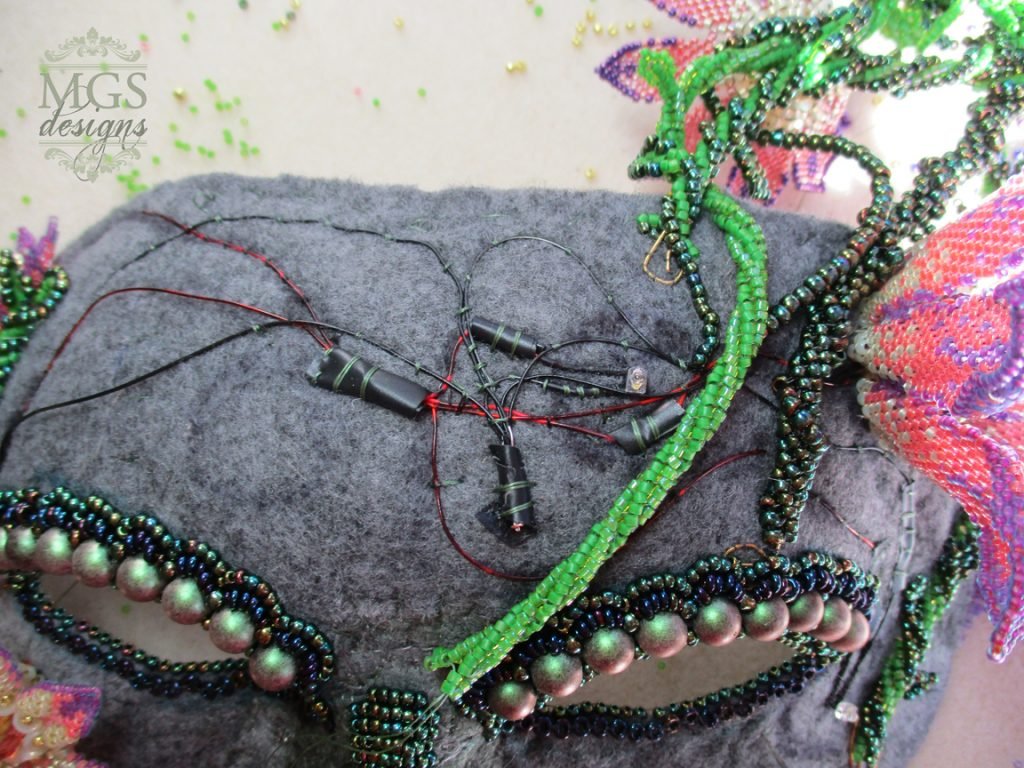 During one of my tests of the LEDs, which I started doing frequently in an obsessive compulsive manner as I stitched more of them onto the mask base, I discovered one that I had threaded up and into a herringbone tube and stitched under a flower had broken, so I had to come up with an alternate plan to place it in the same location as I was unwilling to rip apart the herringbone tube already in place. I also realized at that point I didn't order an extra LED in case of something like this happening, so I ordered three more with express overnight shipping!After that incident, and overall initial learning curve, however, I had no further problems with the LEDs or wiring.
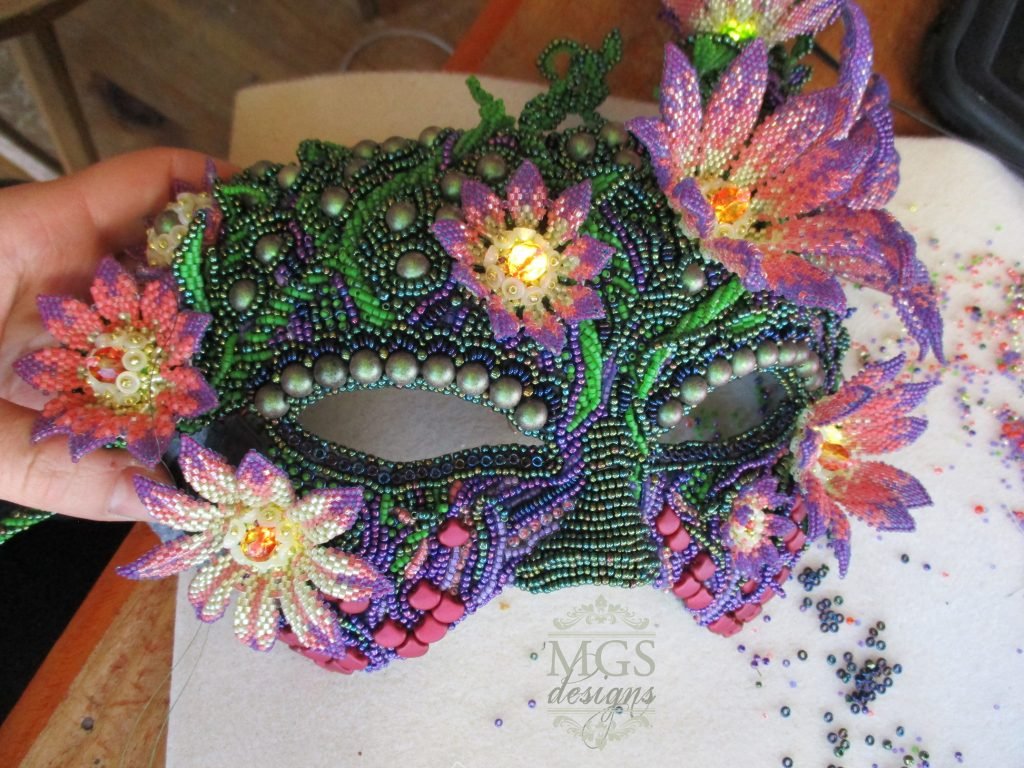
Bead Embroidery
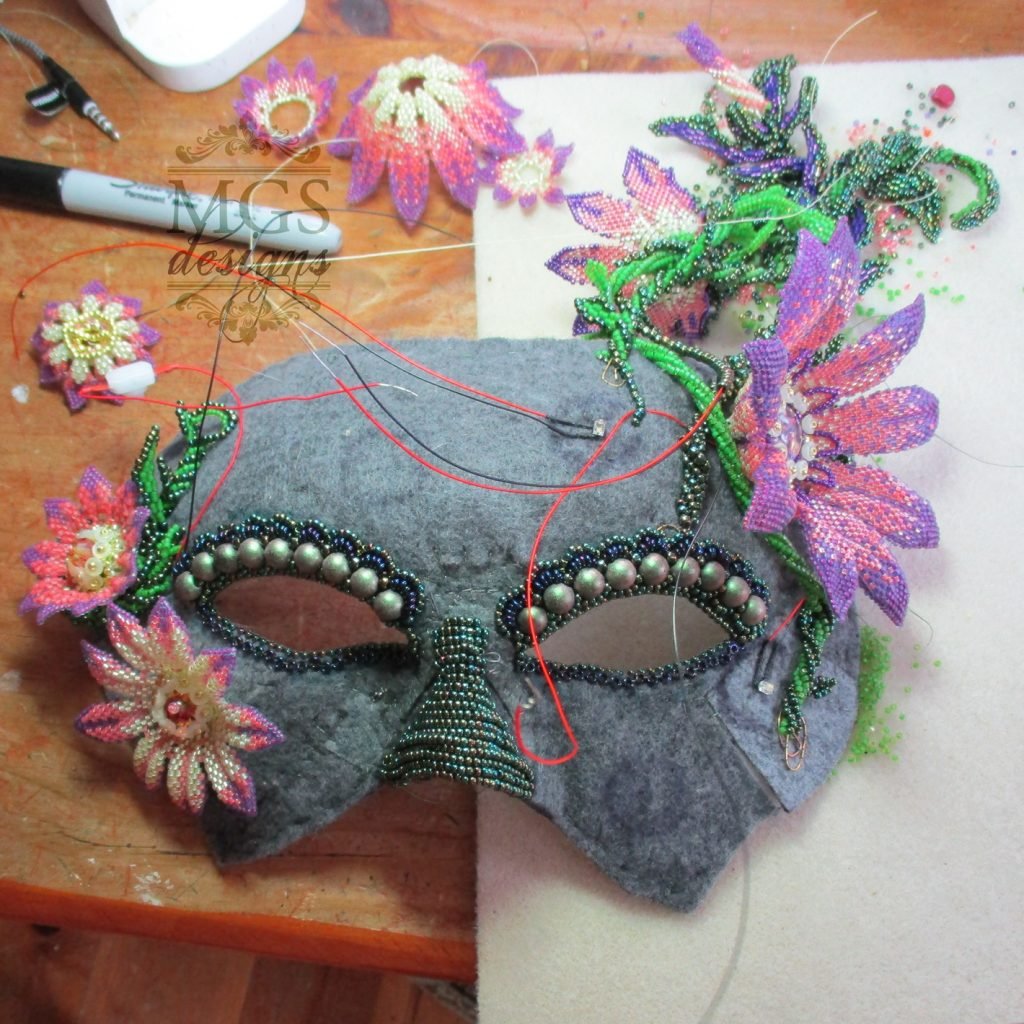
I started working the bead embroidery on the nose and around the eyes first. I like my beading to detract attention from the nose and draw attention to the eyes, so my strategy was to use simple, monochromatic, repetitive rows of beads on the nose, and dramatic beadwork with two-hole Czech cabochons around the eyes.After that part was done, I started the bead embroidery on the cheeks, where I knew I wanted to use the two-hole Czech ginko beads, in their bright red hue, like tiles, with the flowers and vines appearing to grow from between the cracks.
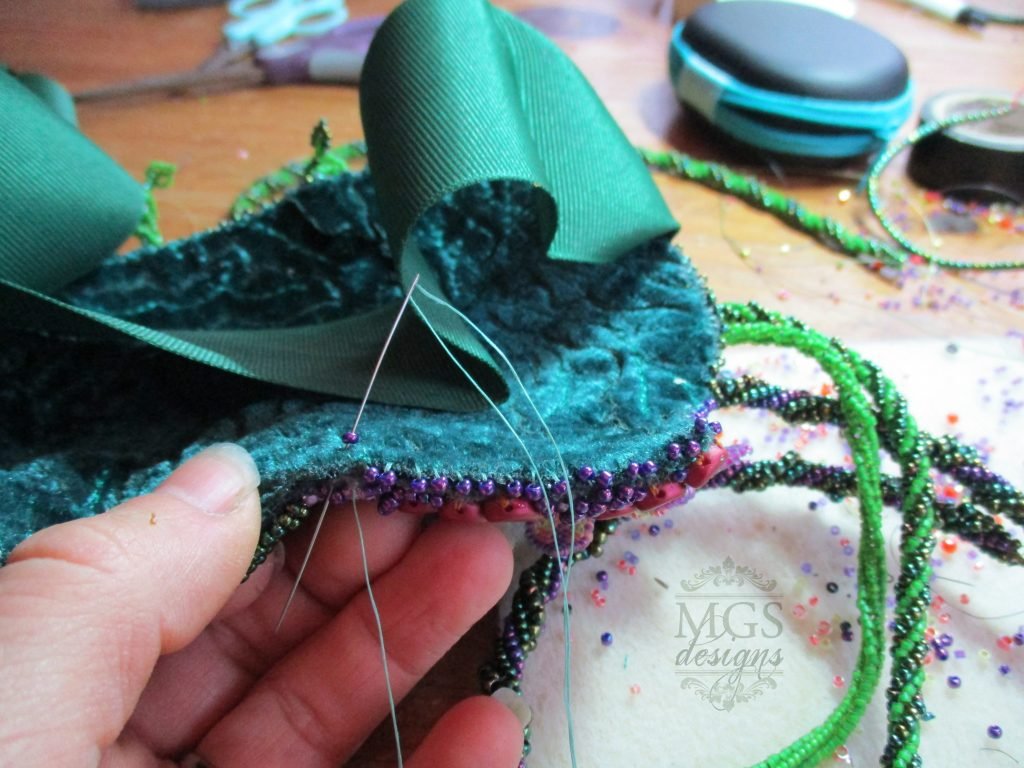
 The last part of the mask surface to be filled in with beads was the left hand temple area, where I needed to attach the neck wrap. After deciding how to orchestrate that part of the project, I had to finish the back side of the mask. I used a matte black fabric paint to paint over all the loose threads and stitches on the back of the mask. Then I cut and applied a textured green velvet fabric with a generous amount of glue and allowed it to dry. For the edging, I opted to add a whip-stitch edging in beads matching the colors of each area of the mask where the beads were being added.
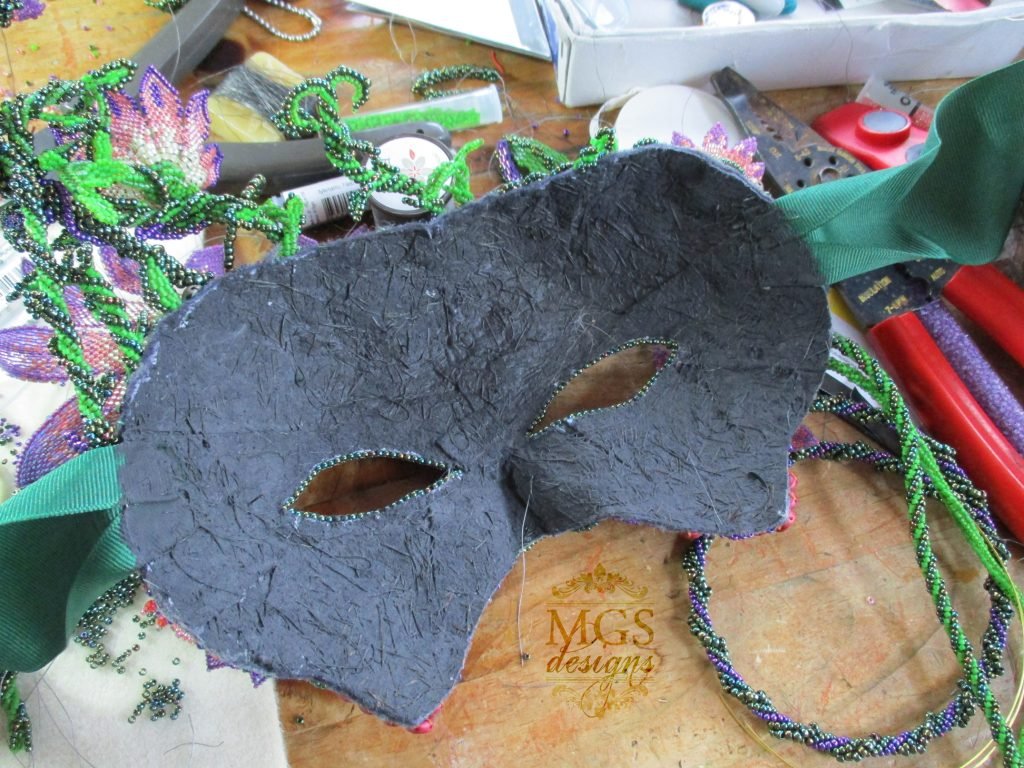
Neck Wrap
I knew I wanted vines to extend down and around the neck from the mask base to the chest. I took a good amount of time fitting together three triangular strips of Peltex cut so they would curve around the neck as I envisioned and sewed them together using the brick stitch bead edging technique. I was able to use this armature to pin flowers, vines, and leaves in place as I was deciding on the overall composition of the headdress. However, I ultimately ended up deciding that the armature was too clunky and I needed to use herringbone vines with memory wire inside as the armature for the neck wrap.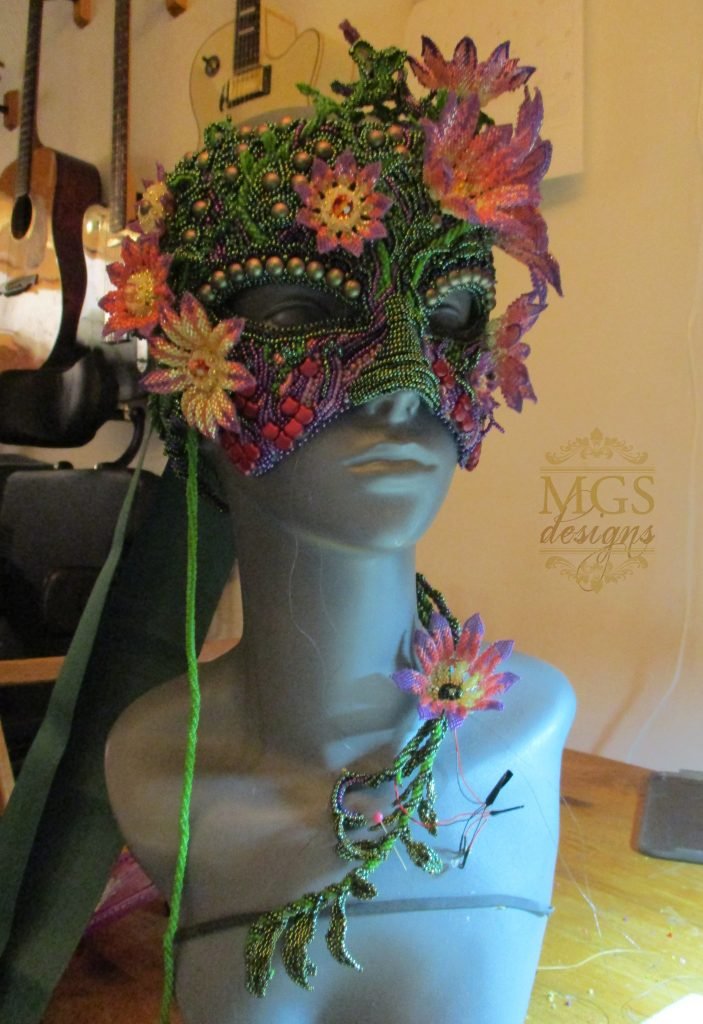
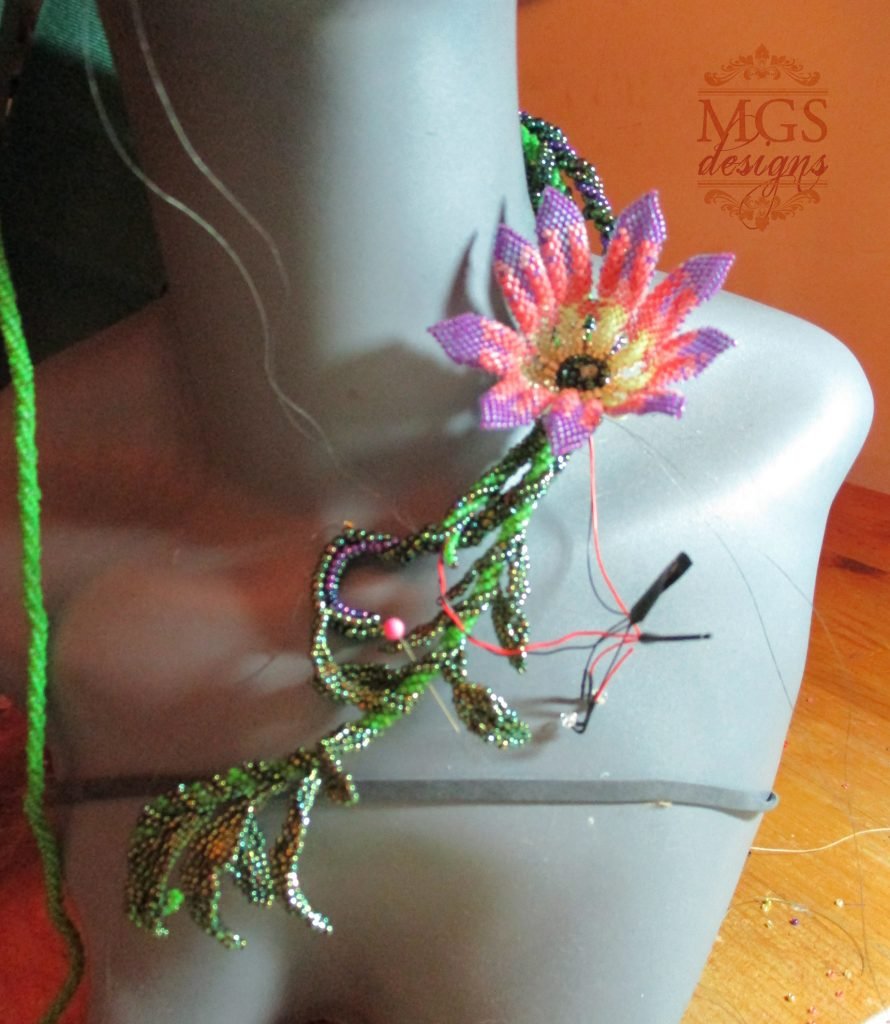
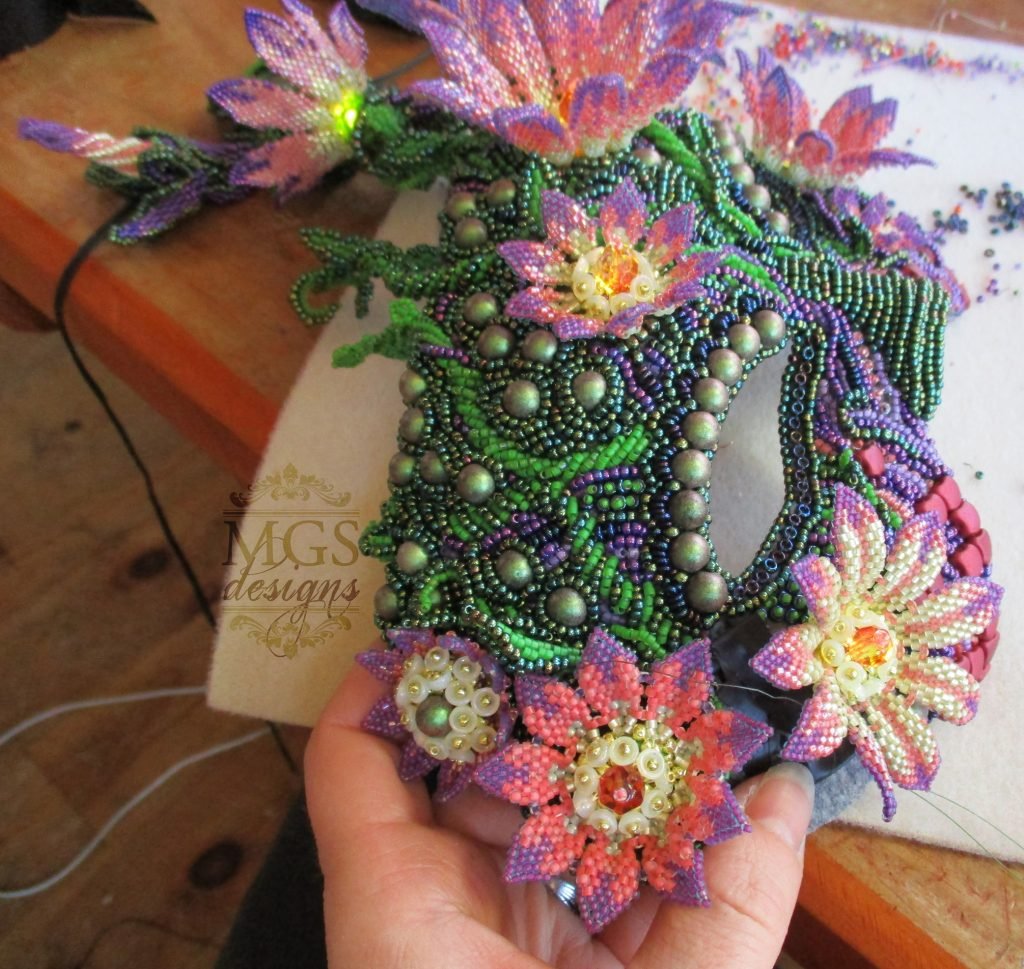
 I placed the large vine with memory wire first so that the flowers and other vines would have a structure to which I could attach them. Then I decided where I wanted the three flowers to go and stitched the LEDs in place to the beadwork already present. Then I stitched the flowers on top of the LEDs. To finish the neck wrap, I had to enclose the in-place LED wires with herringbone rope, so I had to work around the wires meticulously adding pairs of beads and not getting my thread tangled in the wires or vines already in place. This by far was the most tedious part of the project!
Finishing
By the end of this project, I can safely assume I spent well over 100 hours on all aspects of it, including the mask base, beaded flowers, bead embroidery, beaded vines and leaves, and finishing. I had to sacrifice work time, "me" time after the kids went to bed, and sleep time in order to finish the project in the alotted time from October through December, and have it ready in time for Toho to display it at the Tucson bead shows.While I am very happy with the headdress, the process took a lot from me in terms of energy, time, patience, and stress. I wish I could tackle a huge project like this every year, but there simply isn't enough time in my life.For now though, I can tell myself I did a good job; I worked as hard and as long as I could on this project, and now that I have put my needle down, I can bask in the glow of its completion.
![]()
 https://www.youtube.com/watch?v=Jx8PaIYOIJM